Tuesday 28 January 2020

HAY there....!!

Hey everyone....

I'm having so much fun playing with watercolours lately so today I have a new card to share with you using some "Miss Ink Stamps" products along with some watercolour and embossing!!

Stencils are perfect to use with embossing powder so to start this card off I created a heat embossed base with the "Leafy green" stencil and WOW! Jealous guy powder!!


Then using my Stakiwi-colour watercolours I did layers of colour all over the base until I had the desired level of colour I was after!!

Using the "Ei-Ei-O" die I die cut the sentiment HEY using some black cardstock and I then die cut another one from a piece of card I had embossed with the new WOW! embossing Capri powder....

I layered both the different colours of sentiment and added them to the card base with foam tape for dimension!!


I added a fun farm image by embossing the "Rise and shine" onto a piece of vellum with WOW! Opaque bright white and once it was all embossed I fussy cut around it....

A touch of sequins and that completed the card!!

I hope you enjoy my latest creation and I look forward to you visiting here again soon...
Hugz Ashlee

Friday 24 January 2020

Lick the bowl....!!

Hey my crafty friends....

Yippee it's time for another AMAZING brand new release at "Catherine Pooler" and today CP has revealed the Lick the bowl bundle and OMG I love it!! 


I have so many cards to share with you using this bundle, I just couldn't stop creating lol!!
 I can't wait to share them all but here is my first one...


To create this card I first started with a base of yellow cardstock....

I then die cut the "Wall flowers" cover plate die three times, one green, one white and one orange which I layered all together slightly offset to create a shadow effect!!

Once it was all glued together I glued it onto of the yellow base. 


I then die cut one of the new "Stitched squares" and stamped on the sentiment using Icing on the cake CP ink...

Onto the fun of stamping the super cute kitchen images from the "Lick the bowl" stamp set...
Using some CP cardstock and these colours of CP ink....

- Sauna
- Mandarin spice 
- Eucalyptus

Once they were all stamped I die cut them out with the co-ordinating dies and arranged onto the stitched square keeping them in place with some foam tape for dimension!!

Some Crater Lake sequins finished the card off...

I hope you enjoy my new card and all the awesome new goodies Catherine has coming...
There is going to be heaps more awesome reveals this week so keep an eye out for those and I will be back soon to share more cards with you using them!!

Happy crafting, Hugz Ashlee

Tuesday 21 January 2020

Embossing and handmade watercolour....!!

Hey everyone....
 I have a new card to share with you using "Miss Ink stamps" gorgeous "Gardenia" stamp set, "Mouse flower" stencil along with a sentiment from the "Magnolia sympathy" set!!

I've been enjoying using watercolour again lately so I used it for a couple of steps on this card, loose colouring of the image and over an embossed background done with the Mouse flower stencil....


Stakiwi colours handmade watercolour paints used to colour the Gardenia are : 
- Bubblegum
- Mangawhai
- Raglan
- Starlight (Oops forgot to add that in the photo)


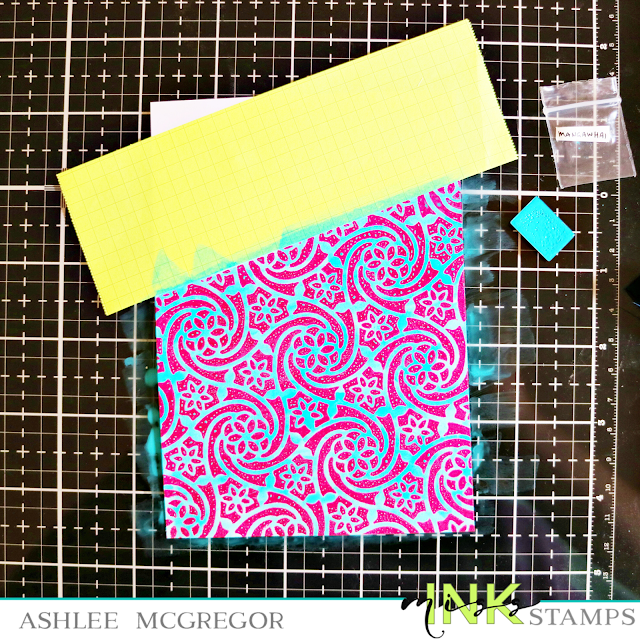
To create the embossing background I first got a white card base and put my mouse flower stencil on an angle holding in place with some magnets and some masking tape so I didn't get any powder and watercolour on the top area...

Using my WOW! embossing ink pad and an ink blending tool I covered the stencil with ink, removed the stencil, added the Primary pink robin WOW! embossing powder and tipped off the excess. It was then time to heat set with my heat gun...

Once all the embossing was complete I could add the watercolour. I used a handmade watercolour from Stakiwi colours called Mangawhai. I mixed some of the paint with a bit of water in a pallet to create a wash of the colour and then brushed over the embossed piece. 
I wiped off the excess and then dried it a little with my heat gun but you can totally just leave it to dry naturally. This resulted in a fun colourful background ready to add images and the finishing touches. 
I hope you enjoyed this post and I can't wait to see you try out the embossing with watercolour background too!!
Happy crafting, Hugz Ashlee

Monday 20 January 2020

Love sweet treats....!!

Sweet treats anyone?!...

I have this card up on the blog at "WOW! embossing" and it features a mix of hearts embossed with powders from the gorgeous WOW! "Sweet treats" embossing powder bundle....


The colours I used out of the bundle are 
- Cup cake heaven
- Picnic basket
- Tangerine dream


To create this card I first started with a white card base and repeatedly stamped the LOVE sentiment from the "All inside" set by Ellen Hutson with Memento tuxedo black ink. 

Then using my spectrum noir tri-blend marker I shaded the letters...


Using a white piece of cardstock I stamped a mix size of love hearts also from the stamp set using WOW! embossing ink and then heat embossed with the three different powders included in the Sweet treats set....

I then added all the WOW! embossed love hearts to the card base with some foam tape for added dimension. Finished off the card with a sentiment strip and some sequins for a touch more bling!!


Above is all the fab WOW! products I used to create this card...

I just love these colours they are so vibrant and pretty!!

Quick tip...
To get the powders even more vibrant and full after you have embossed your first layer of powder while it is still hot tip some more powder on and heat again. You can do this technique as many times as you like until you have your desired thickness!!

Hope you enjoyed todays card, Happy embossing 
Hugz Ashlee

XOXO....!!

Hey my crafty friends...

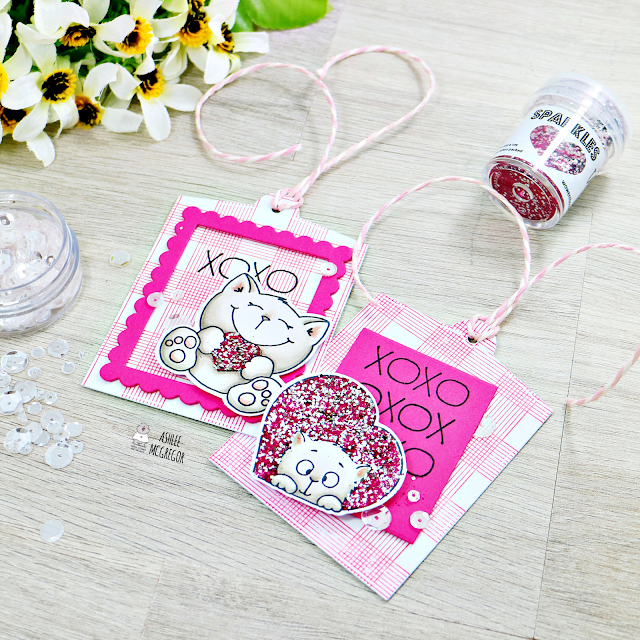
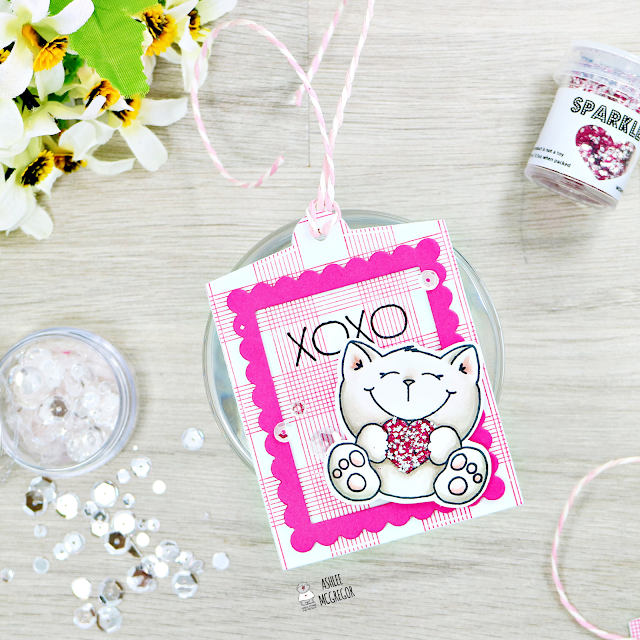
Im up on the blog at "Gerda Steiner designs" and I have some pretty in pink tags featuring the brand new stamp set "Only for you" ....

This little stamp set is full of cuteness perfect for valentines day that will soon be here!!


To create these tags I first die cut the trendy tags base from a new MFT die and then stamped on the all lined up background pattern using some Party dress Catherine Pooler ink....

I cut out the frame and the insert piece (also from trendy tags die) from pink cardstock and then on each tag I stamped the XOXO using some Memento tuxedo black ink!!


I stamped the two cat images and then coloured them up using my Copic markers...

To add some sparkle to the hearts on each cat I used some liquid glue and covered it in WOW! Sparkles Prom Queen!!


I added a touch of Crater lake sequins and some string to each tag to finish them off...

These will be perfect little tags for valentines or even just to send to a friend with a gift!!

I hope you enjoy them and feel inspired to create your own tags....
Happy stamping Gerda fans, Hugz Ashlee

Thursday 16 January 2020

You're so sweet....!!

Hey my crafty friends...

I'm stopping in tonight with some "Create a smile stamps" inspiration and this card features the super cute and yummy stamp set "A little treat"...

I first cut a white card base to size and then using a mix of all the images I stamped them on the top portion using a super light grey coloured Altenew ink...


I then added a sentiment "You're so sweet" using some Memento tuxedo black ink...

I used the same black ink to stamp out three sweets and then coloured them up using some Spectrum noir ti-blend markers!!

Once they were all coloured I added them to the card base using some foam tape for dimension!!


I finished it off with some pretty coloured sequins to match the colours I coloured the sweets and it was complete!!

I hope you enjoy my latest CAS inspiration...
Happy crafting, Hugz Ashlee

Tuesday 14 January 2020

Inspirational quotes....??!!

Hey everyone...

I love drinking coffee and I also enjoy creating coffee themed cards so the stamp set "Java Joe's" from "Miss Ink Stamps" is absolutely perfect for this!!

Java Joe's I think would have to be one of my absolute favourite stamp sets from MIS, it's so cool that you can create coffee scene along with great coffee sentiments!!


To create this card I first masked off a section of my card base with some masking tape so that I could create a distress oxide ink (Pumice stone) ground...

I then stamped on some bricks for the coffee shop, added a few clouds to the sky with Mermaid Lagoon distress oxide ink to the sky using the "Scene builder" stencil and a fun sentiment!!


I stamped coloured and cut all the images for my scene, arranged them on my card base and then stuck them down using some foam tape for dimension!!

Copics :
WO, W3, W7, W8, C00, C0, C3, B00, B01, B02, E44, E47, E50, E51, E53, E55, YG13, YG17, Y17, Y18, YR27

To finish off the card for my usual touch I added some sequins from Catherine Pooler for a bit of bling!!


I hope you all enjoy this coffee themed card, Happy crafting..
Hugz Ashlee

Saturday 11 January 2020

The Gray Muse....!!

Hey my crafty friends....

I am SUPER excited to be a guest designer for the lovely Rubeena at "The Gray Muse"...

The Gray Muse is a shop with super cool pins, stickers, stamp sets and the best coaching inspiration from Ruby herself!! 

I have a set of cards to share with you that I created using a couple of different stamp sets...


I have been wanting to experiment more lately with my watercolours so I thought these stamp sets were perfect to get the paint out and have a creative play!!
(I used Gansai Tambi paints) 

To create these cards I first started with a piece of purple cardstock and blended on some Catherine Pooler Grape crush ink around the edges. 

For a fun effect I mixed a bit if the gold watercolour paint with water and splattered it onto the base...


For the beautiful images I stamped them with WOW! embossing ink on Ken Oliver watercolour paper and heat embossed with Gold embossing powder...

It was then time for the watercolour...
It's so much for and so relaxing to just sit down and paint, I really enjoyed it!!


Once images were all coloured I fussy cut them out and added to the card base using some foam tape for dimension....

To finished them off the first card I added a sentiment from the happiness blooms set and for both a touch of pretty sequins for some bling!!

I'm so happy with how these cards turned out, I hope It gets you inspired to get out your stamps along with your watercolours and take the time to relax and have some creative fun!!

If you haven't already why not pop on over to "The Gray Muse" shop and have a browse at all the wonderful products available... 

Thankyou so much for having me Ruby, 
I'm definitely going to be sharing more cards using TGM stamps very soon!! 

Happy crafting everyone, Hugz Ashlee. 


Wednesday 8 January 2020

Celebrate...!!

Hey everyone...

Hope you are all having a fun crafty week so far!!

I have a new "Miss Ink stamps" card to share with you tonight and this one is a bright celebration card....


To create this card I first stamped the large "Alice background" onto some pink cardstock using Party dress Catherine Pooler ink...

I then added a die cut stitched circle to the centre of the card base where I planned to add my fun images from "PiƱata party"!!....


All the images I coloured up using Spectrum Noir Tri-blend markers in the colours :
Pale pink, Bright pink, Blue turquoise, Citrus green blend and Green turquoise...

Using the "Streamers" co-ordinating die I cut out the celebrate word using white and pink card...

The images were added using different layers of foam tape for assorted dimension and then the whole card was finished off with some pretty Catherine Pooler sequins!!

Hope you enjoy todays inspiration, Hugz Ashlee


Monday 6 January 2020

Winter beauty scene....!!

Hey everyone....

Have you seen the brand new "Wonderful winter" mini kit from "Create a smile stamps"....??
If you haven't you totally need to check it out because it is GOOOOORRRGGGEEEOUUUSS!! 


Look at all the awesome stuff you get in the kit, how cool is that!!

I felt so inspired by the little chipboard embellishments included in the kit which totally made me want to create a card where they are the main feature so this is the card I came up with....


I created a subtle starry background using the "Twinkle stencil" and some Hickory smoke distress oxide ink....


For more details and steps on how I created this card pop on over to the "Create a smile blog" and maybe you can create a card just like this one!!

I hope you enjoy this card and happy crafting, 
Hugz Ashlee

Friday 3 January 2020

Love melt it....!!

Hey my crafty friends....

I am up on the blog at "WOW! embossing" with some inspiration for you using our monthly theme at "WOW! embossing" Facebook fans group which is Valentines day/Love/Wedding/Anniversaries.... 


To create this card I first started with a base of pink cardstock and used some Catherine Pooler party dress ink which I blended on the bottom half of the card...

Then using an embossing folder I had in my stash I embossed some pretty flowers into the paper!!


Next step I die cut the "Love shaker" from Pretty pink posh twice in white cardstock, one of which I embossed parts of with Cup cake heaven WOW! embossing powder from the Sweet treats collection....

Using some foam tape I added the two hearts to the card base by offsetting them adding some dimension to the layers....


It was then time to get out the Melt it powder...

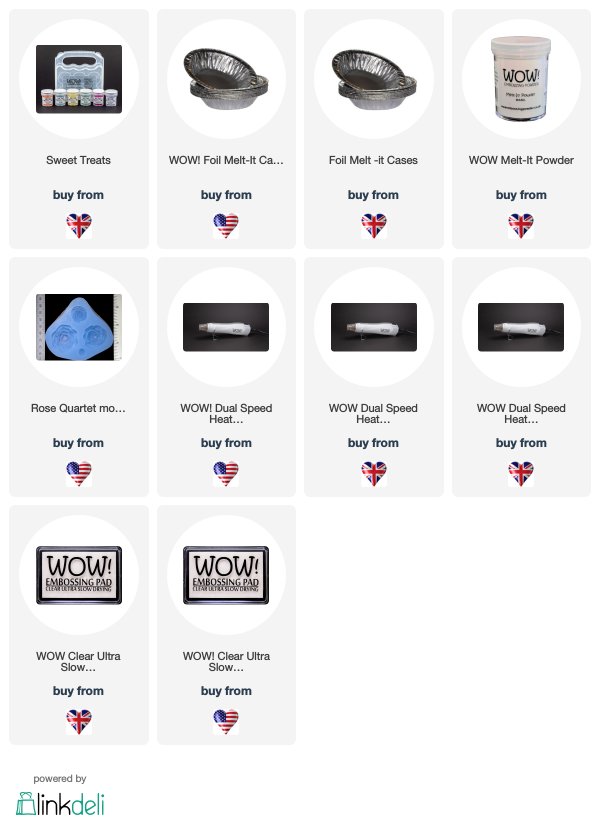
I mixed some melt it powder and some "Cup cake heaven" powder into a tin pan and melted it from underneath with my WOW! dual heat gun....

Once it was all molten I tipped it into the rose quartet mould to create a beautiful glittery flower!!


Once all the layers of the card were finished I added on a touch of Catherine Pooler sequins from the "Inspiration point" mix!!

Here is a picture of all the fabulous WOW! products I used to create this Love card....


Melt it powder is so much fun... 
I highly recommend giving it a go as there is so many things you can make with it!!

I hope you feel inspired by the love theme and come and join us in our monthly challenge, you will even be in with the chance at a voucher to the WOW! store if you enter....

If you feel like doing some WOW! embossing shopping then heres a discount code for you for 10% off your whole order - WOWDTAB

Happy embossing everyone, Hugs Ashlee. 

Connect With Us:
Info Site: www.wowembossingpowder.com
 
bloggr.png  facebook.png  instagram.png   youtube.png  pinterest.png

Website-Icon-UK-Webshop.gif

Website-Icon-EU-Trade-Webshop_1.gifWebsite-Icon-USA-Trade-Webshop_1.gif

Website-Icon-USA-Webshop.gif
Powder Arts Thermography Warehouse LTD, Caslon House, Lyon Way, St Albans, AL4 0LB