Tuesday 29 June 2021

I love you....!!

 Hello my crafty friends...

I've got a new slimline card to share with you today and this one features the absolutely adorable kitties from the "Valentine cats" stamp set by "Gerda Steiner Designs"!!


I thought it would be fun to do a whole base of colourful stripes peeking out from behind the love heart panel....

I then popped up the cats with some foam tape sitting them both in front of a heart!!
(The cats were both coloured using Spectrum noir tri-blend markers)


I added a couple of lovey sentiments and finished it all off with a touch of "Catherine Pooler" sequins from the Williamsburg mix!!

I love how this card came out, what do you think? I hope you enjoy it and feel inspired to get crafty and create your own slimline card... they are so fun!!

Happy crafting, hugs Ashlee

Thursday 24 June 2021

HEY... cup of tea!!

Hey friends...

I have a card to share with you featuring the "Positivi-tea" stamp set!!

I just love this set, I can't help but keep creating with it hehe...

There is also co-ordinating dies available too (Positivi-tea dies) which makes them super easy to cut out!!


To create this card I started with a white Cardstock base and die cut the sentiment HEY using some letter dies from Uniquely creative. I then stamped the sentiment slightly under the HEY on the left hand side with Memento tuxedo black ink. I wanted to add the cute bear popping out of the side with his cup of tea so I stamped him with the same black ink. I added a little shading to his cup of tea with a spectrum noir marker. 

To add some colour behind the HEY sentiment I sprayed some Dina W gloss sprays onto a piece of cardstock and added them in behind the sentiment for a fun pop of colour....

To finish off the card I added a touch of sequins!!


I hope you enjoyed this new card and feel inspired to create!!

Hugz Ashlee

Tuesday 15 June 2021

CPD and Pear Blossom Press colab....!!


Welcome to the Catherine Pooler Designs x Pear Blossom Press Collab Hop! 

We're sharing fun, interactive cards that will really brighten your day. They feature awesome new stamps and dies from Catherine Pooler Designs, and with help from Pear Blossom Press, they all really light up!  Be sure to hop along with us for loads of inspiration; our designers have come up with some brilliant cards...


Oh my gosh I has so much fun combining these two awesome companies...

I hadn't tried the PBP lights before so I was so excited to play with them and see how easy they were to use!!


I created a couple of cards for the hop, I hope you enjoy and get inspiration from them...

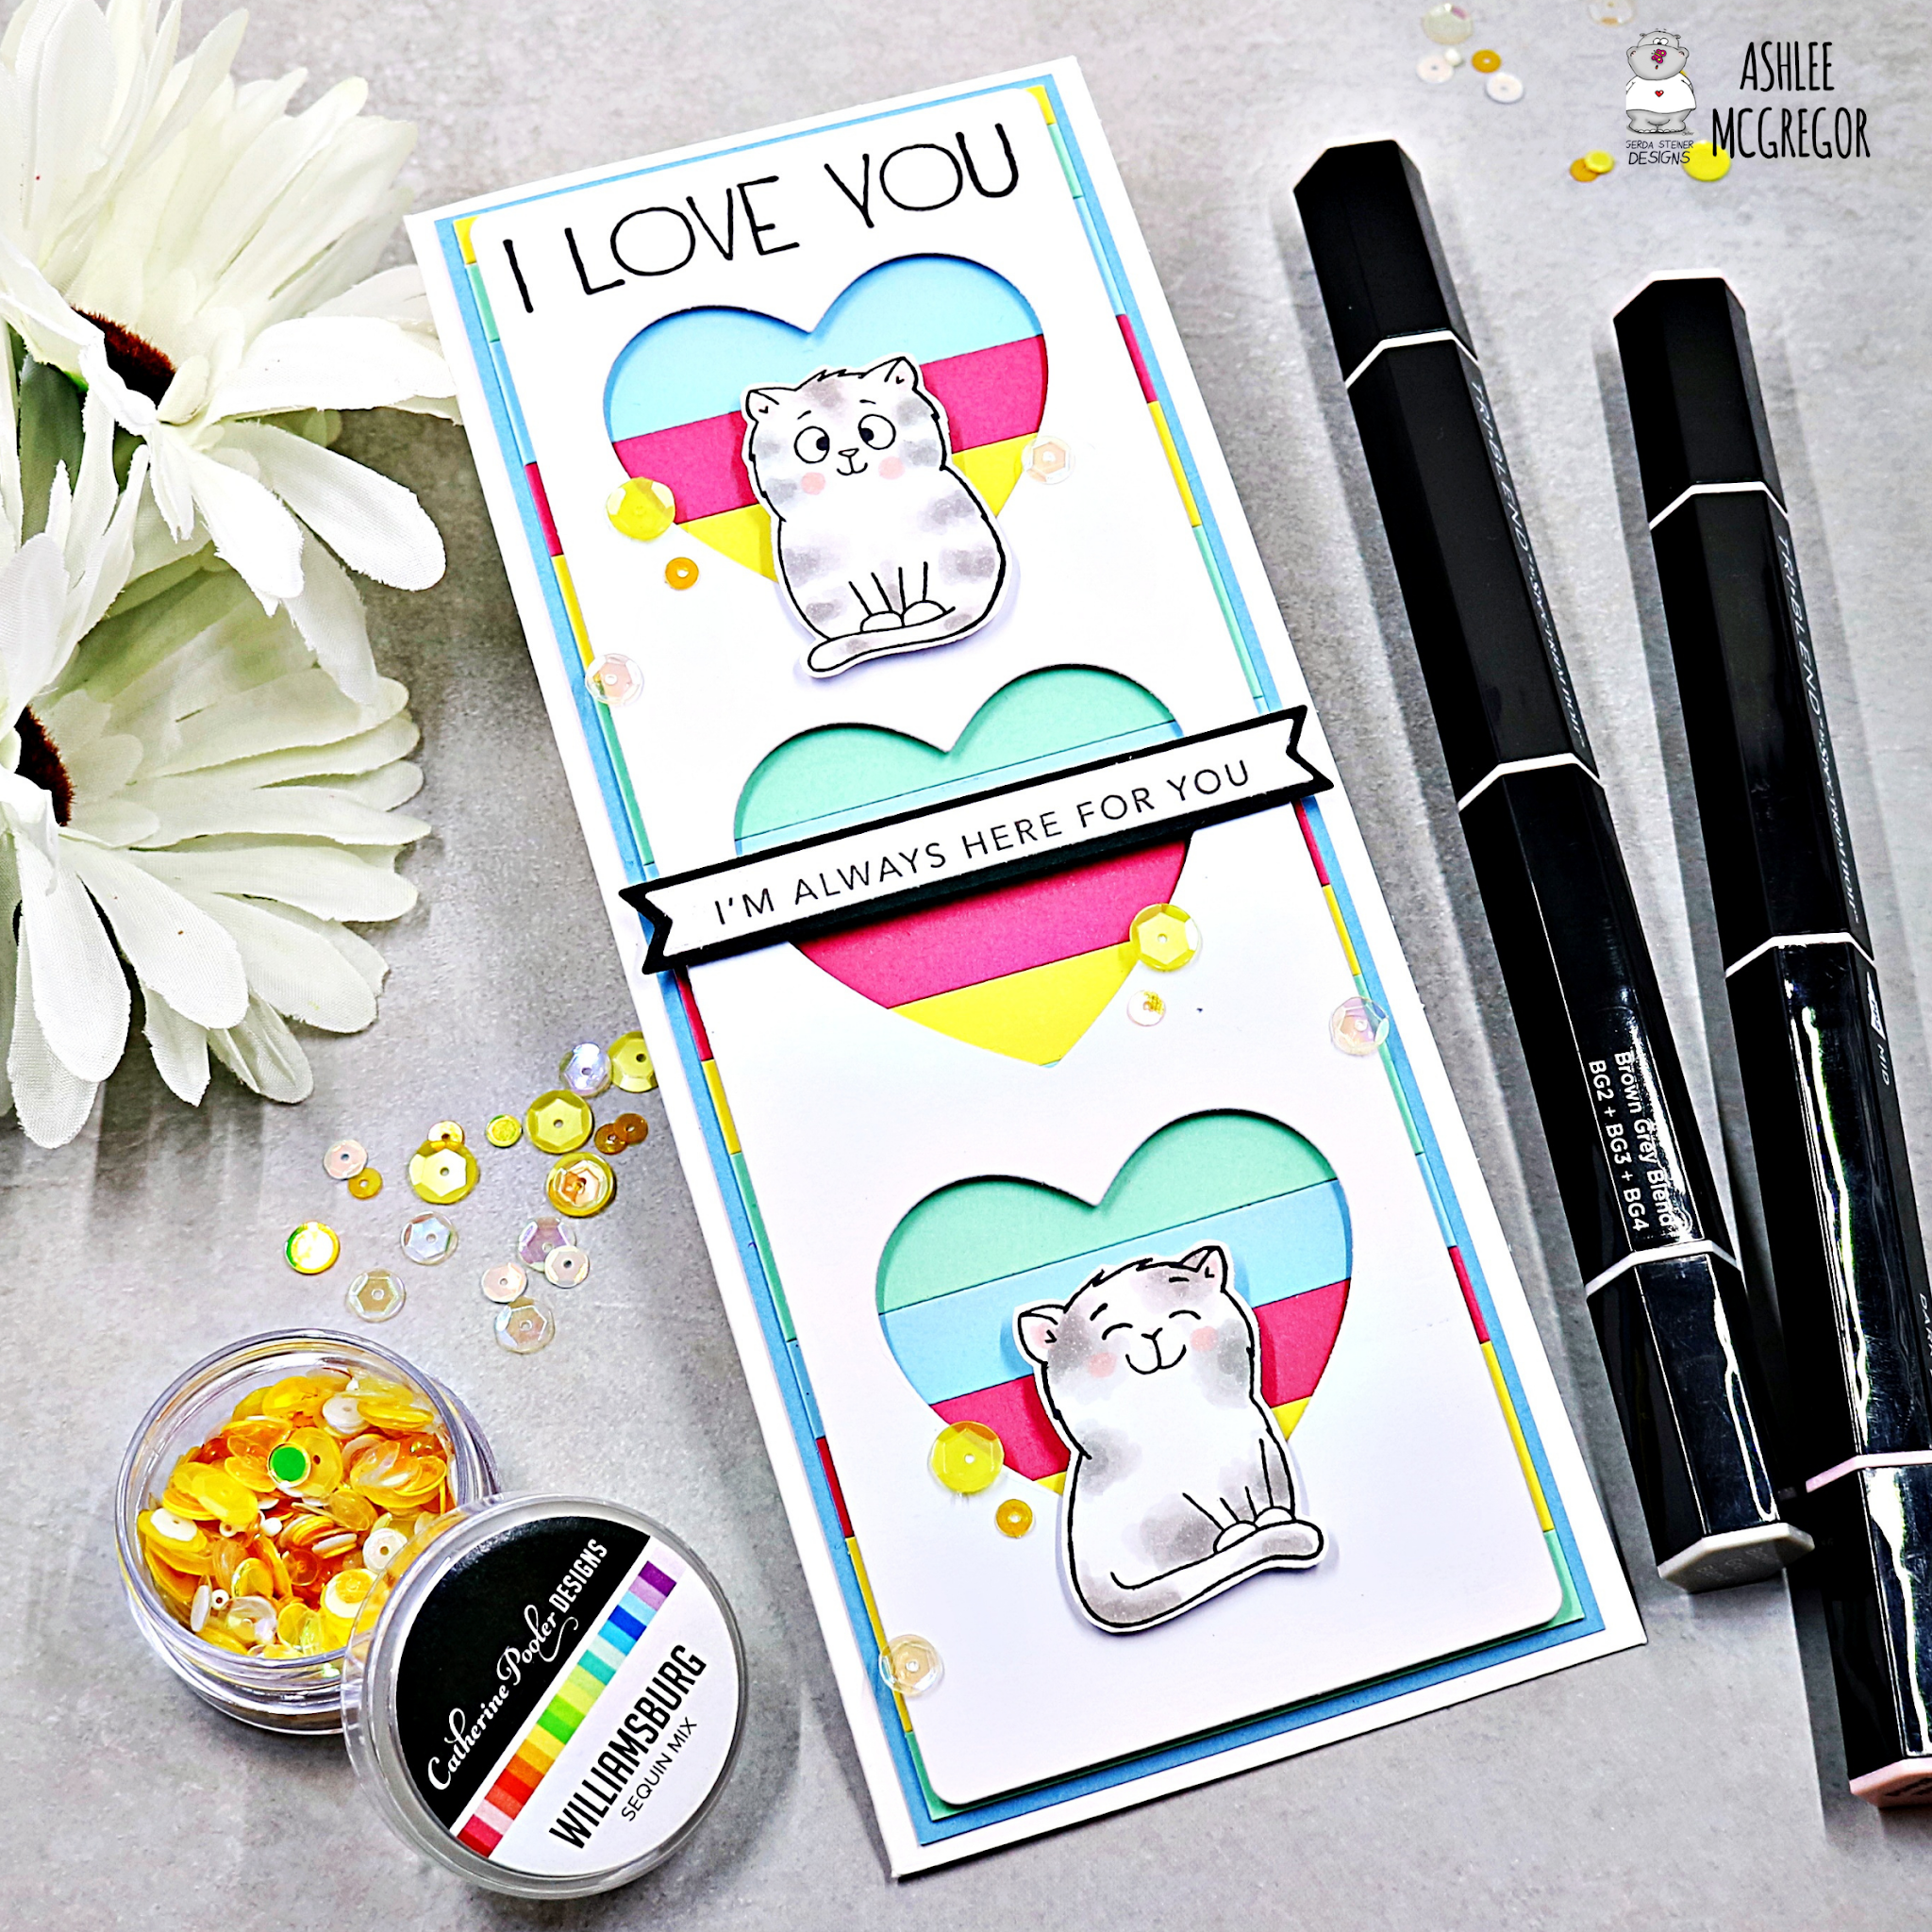
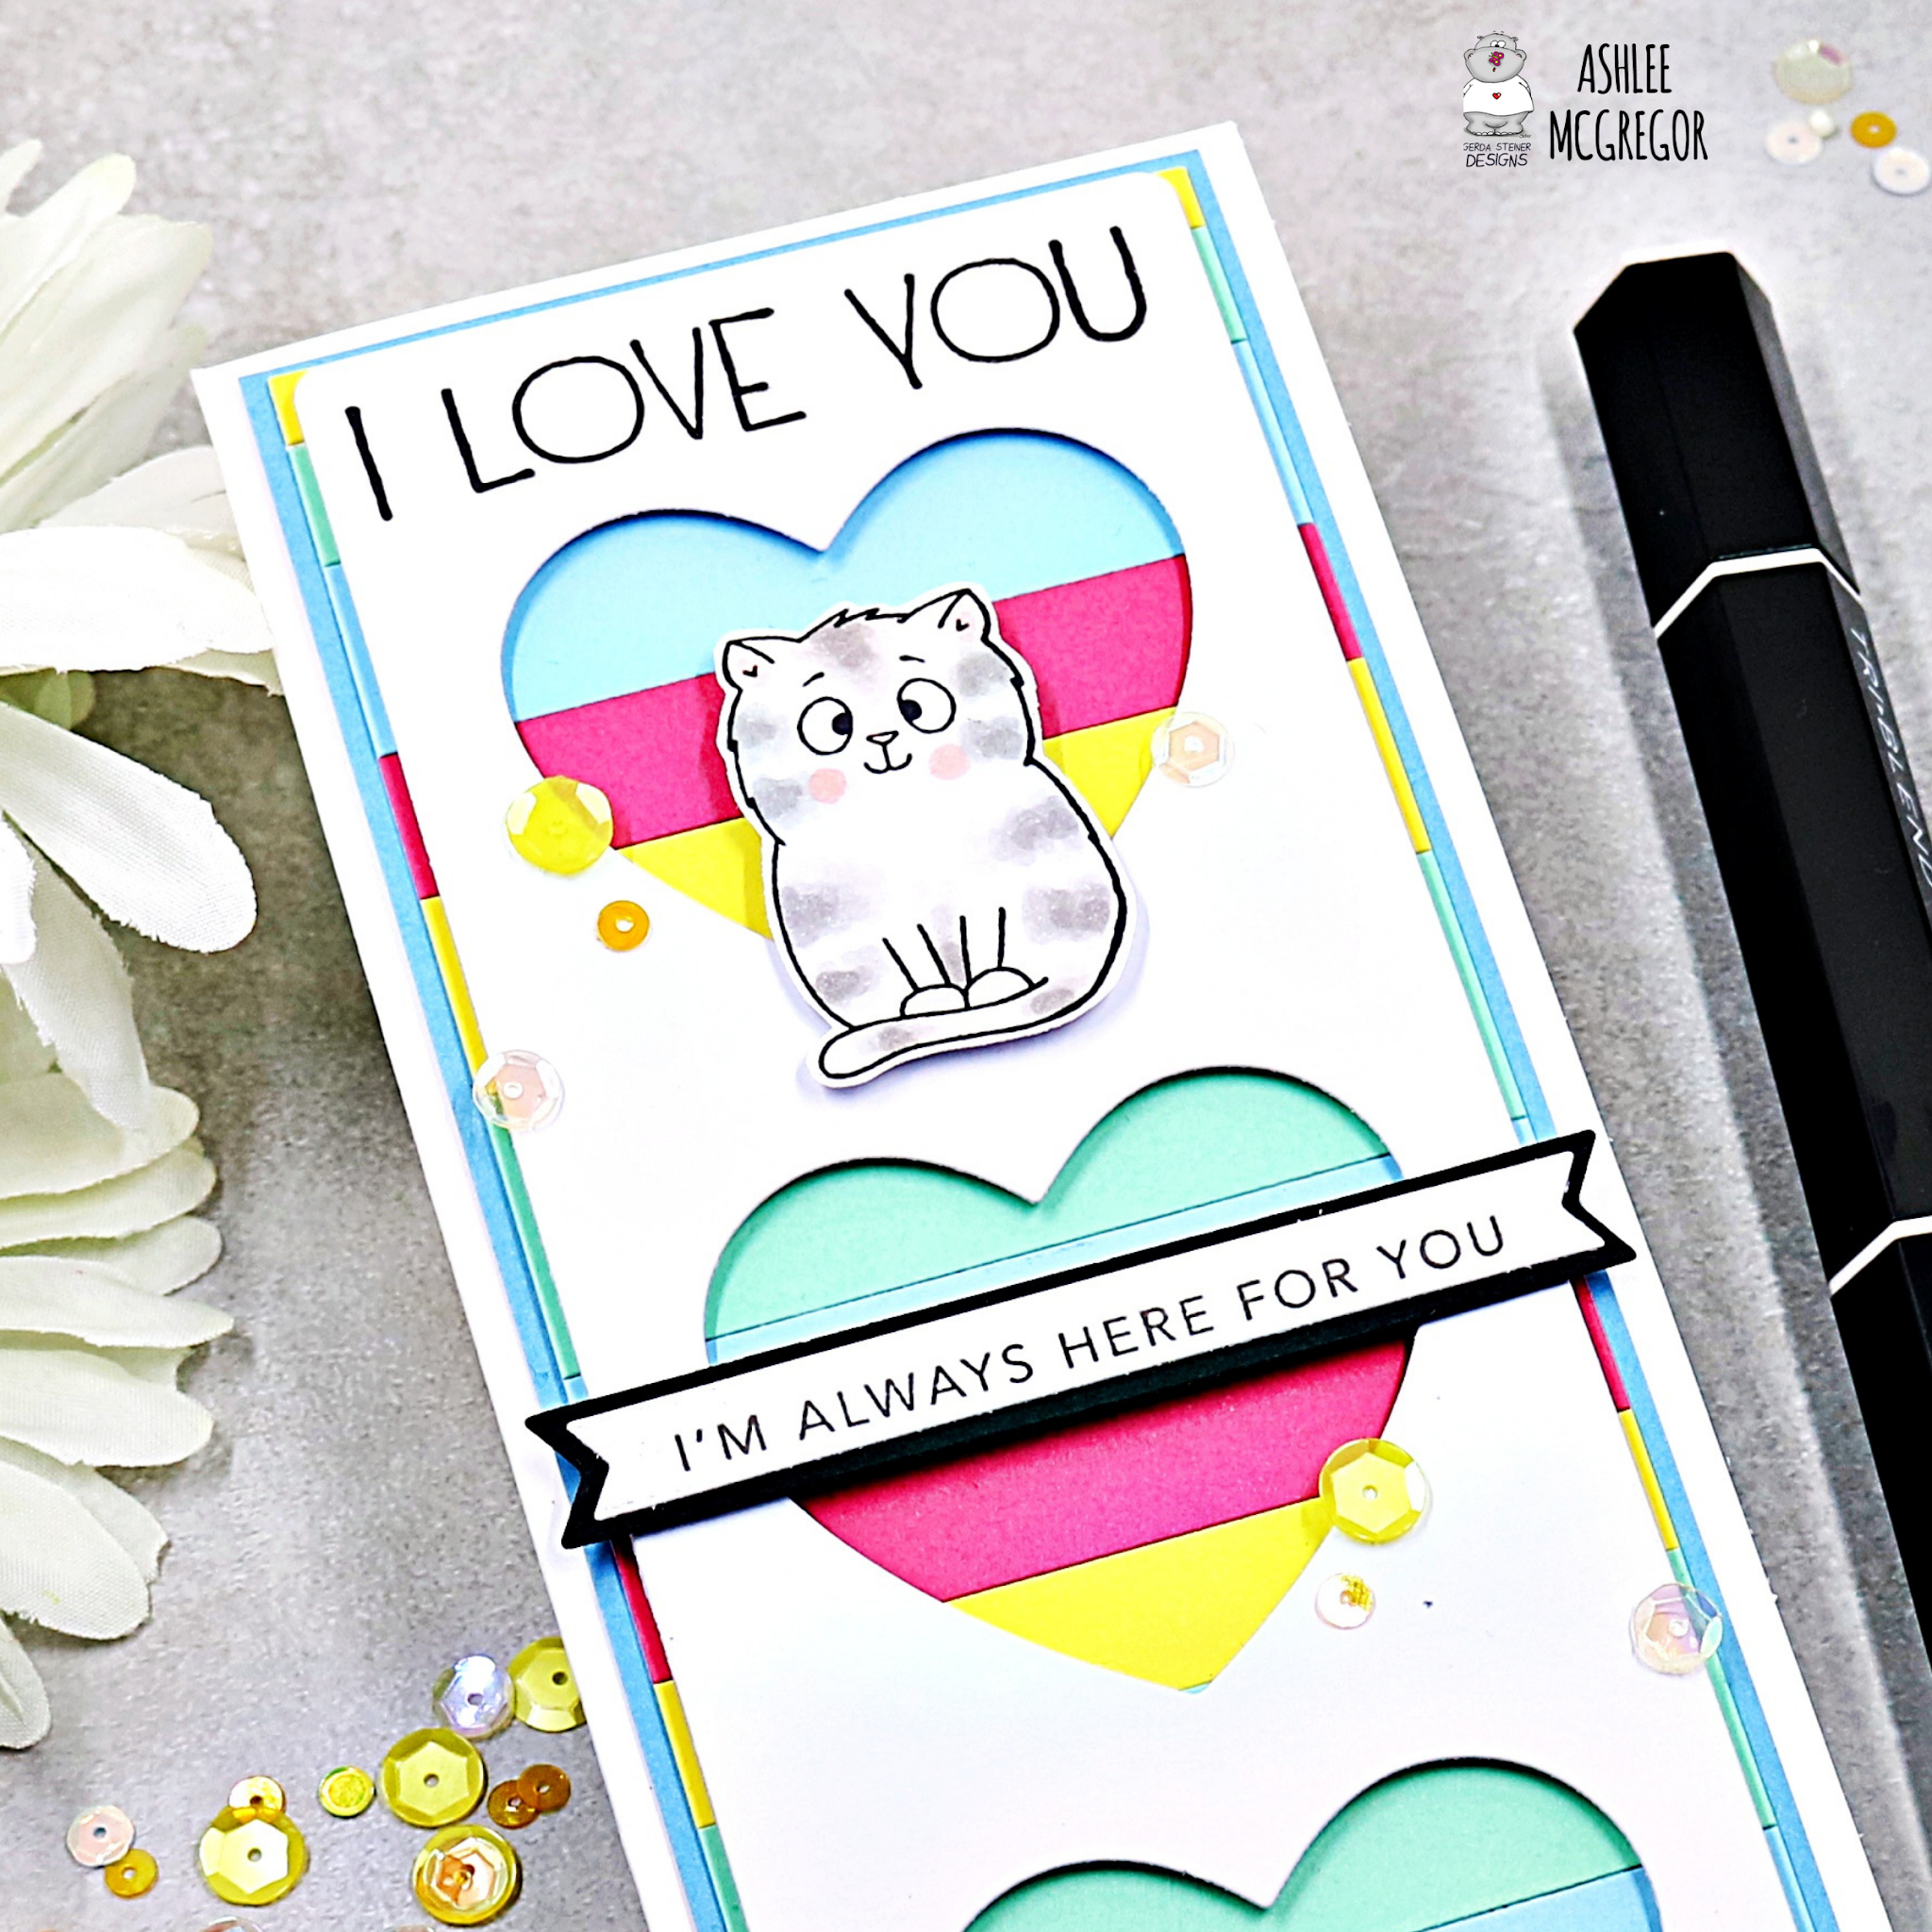
This first card I created by starting with a base of yellow cardstock and stamping half of it with the CPD background stamp "Laundered linen" and some Twilight ink!!


I die cut a circle and added a frame to create a shaker window and filled it with some CPD "Williamsburg sequins"...

I stamped and die cut some images from the "Bright days" stamp set and added them to the base with foam tape!


I completed the card by adding a sentiment and a touch of sequins...

Well the card wasn't totally complete...
Now the the design base of the card is finished it's time for the PBP light component!!

This picture below shows exactly how I placed the "PBP Halo light" and added foam tape around it... 

The light I taped in place with some double sided adhesive in a position that would line up with my shaker portion of the card...


I just couldn't believe how easy these lights were to use... 
I guess that's why they are called EZ lights hehe!!

There is no mucking around with circuits just pop it in the right place for where you want your light to be and your good to go!!


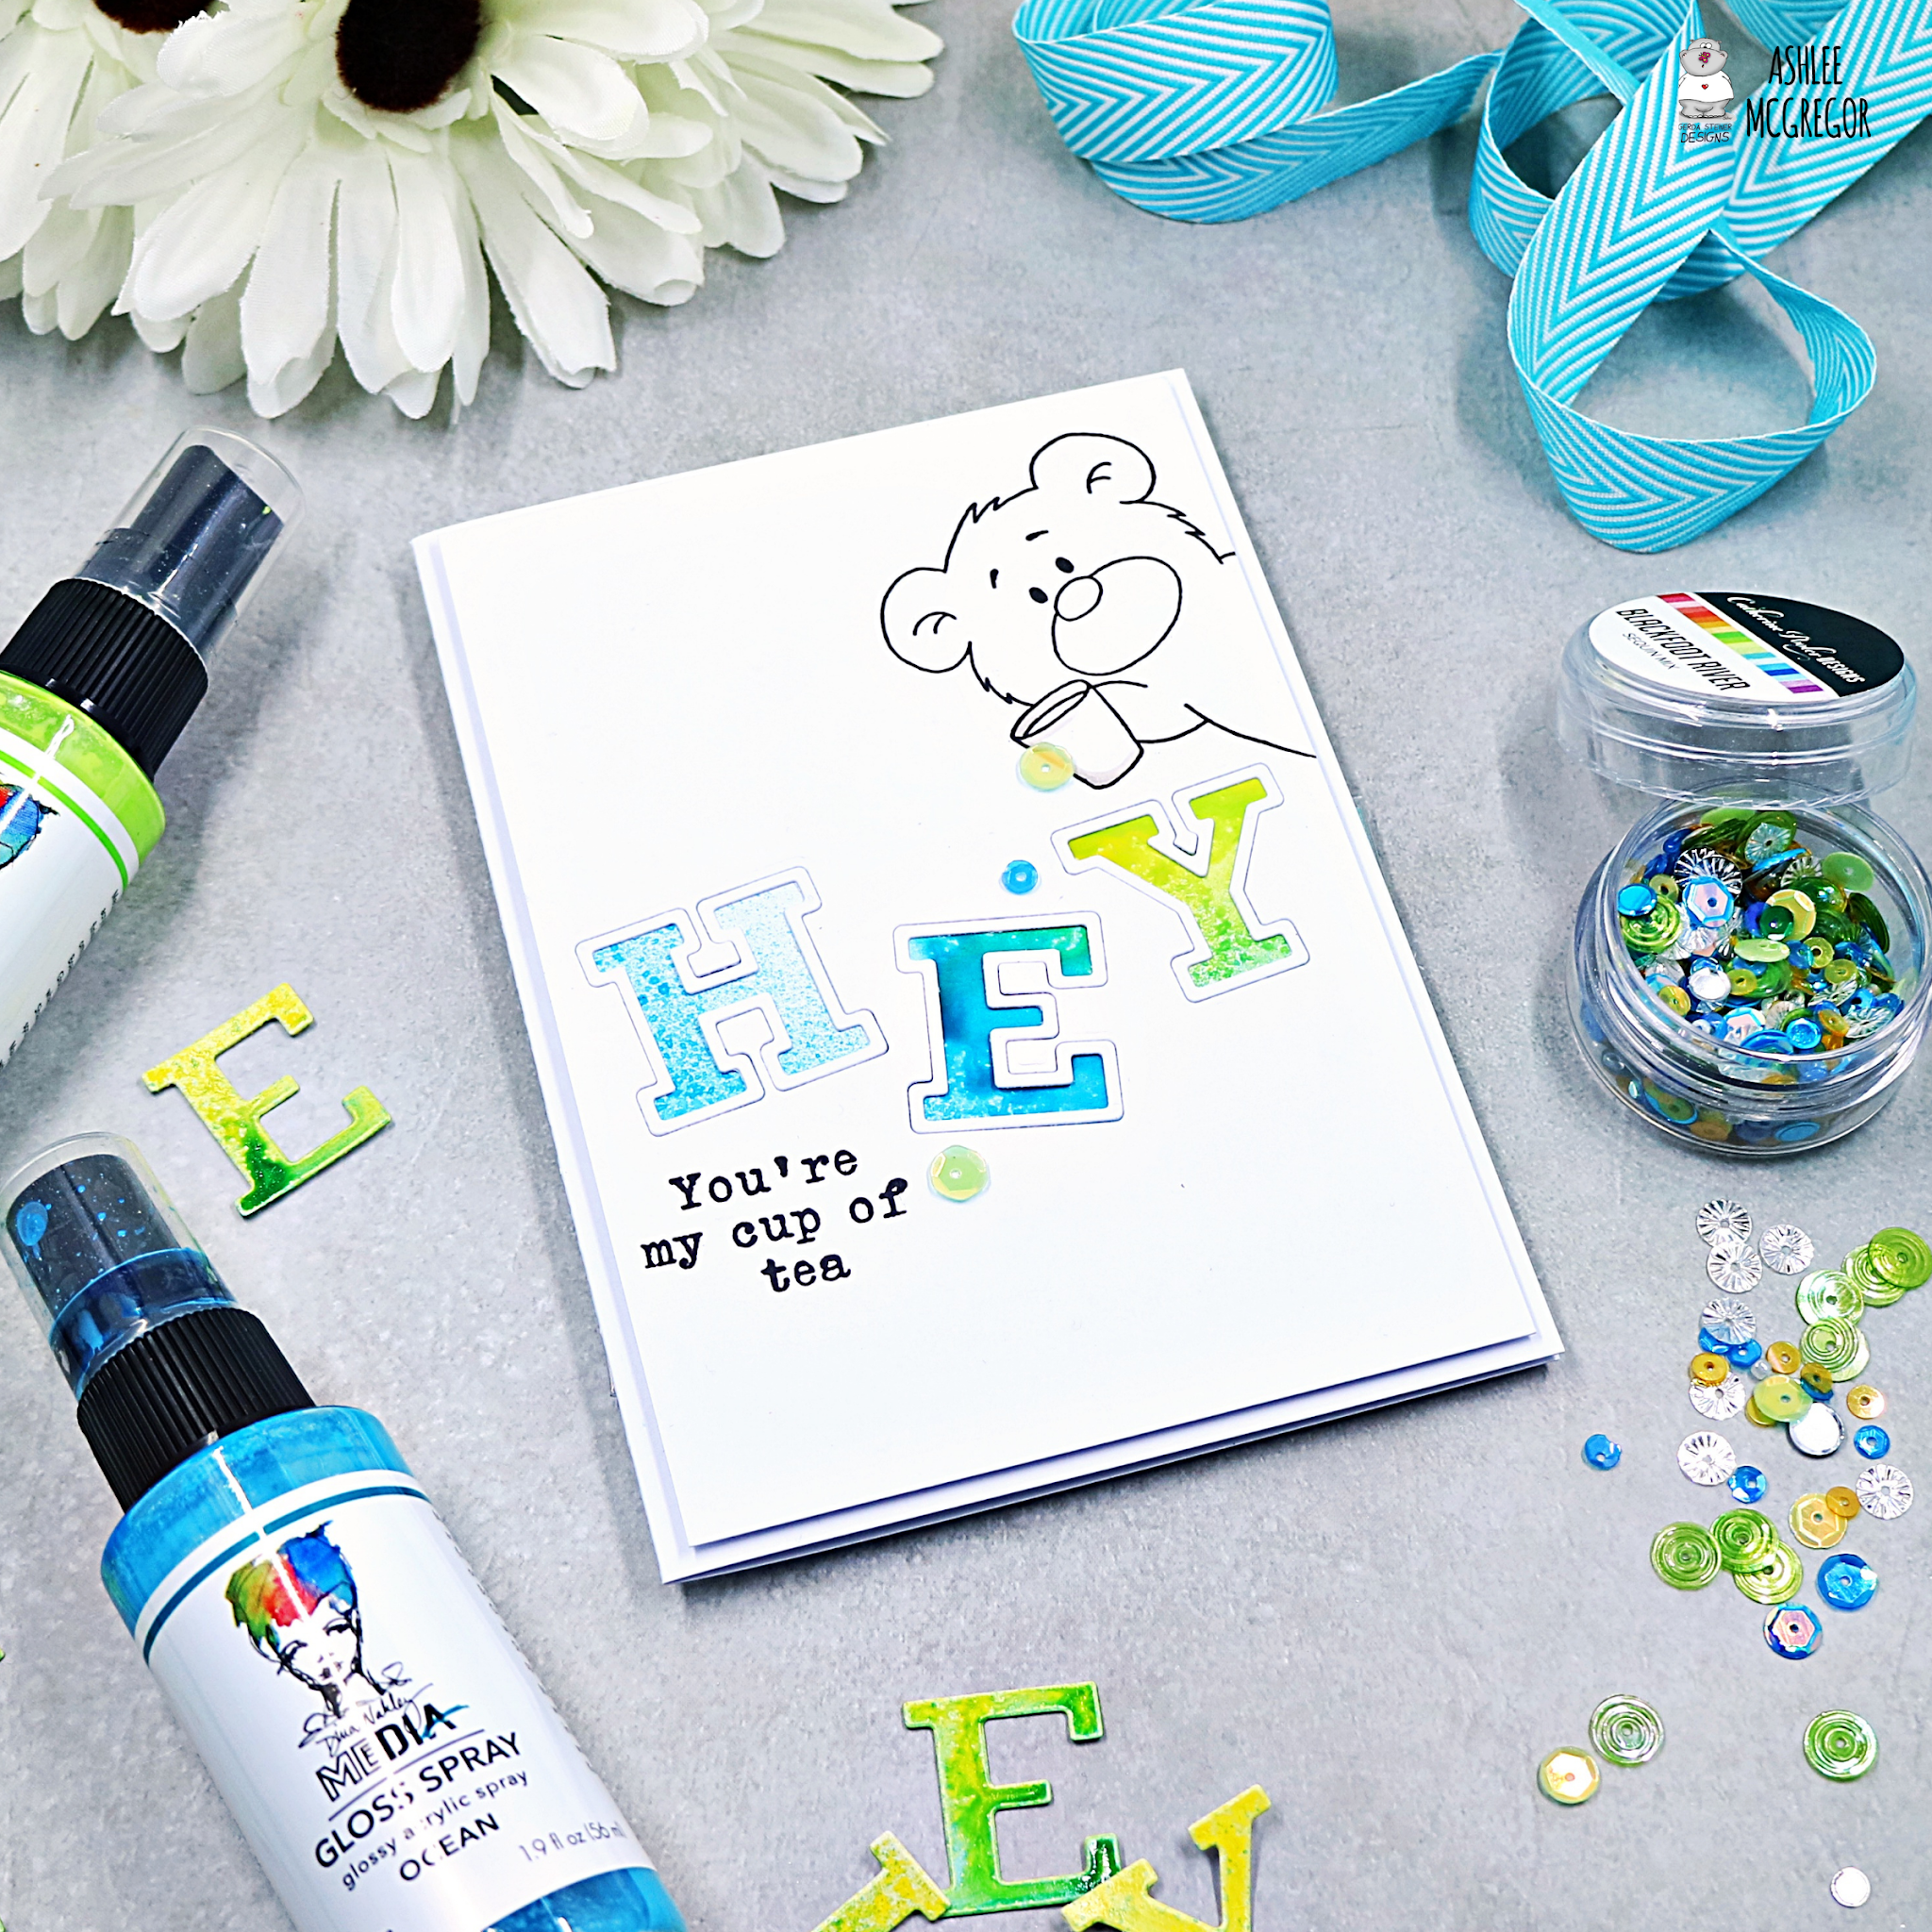
This second card was a simple CAS design which I made so that when you press the ON part of the light switch it's the way you turn on your "EZ- PBP light"....


I stamped all the images directly onto the card base and added a little colour with some Spectrum noir tri-blend markers...

I then used a pokey tool to add three little holes into the light globe as these were going to be my positions for the PBP light!!

I added my EZ light onto the back of the card base and then lined up each little wire with light in to each of the little holes and taped them in place...
(So sorry I missed a photo of the back so you could see the light on this one oopsies)


How cool is it when they light up??!! ....SO much fun!!


Want to see lots more awesome inspiration then keep on hopping along, here is the hop list...

Every good hop has prizes, right? So Catherine Pooler Designs, and Pear Blossom Press are each giving away a $25 store credit! Comment on this post by June 25, 202 to be entered to win. Winners will be announced on June 28th. 

Happy hopping everyone, hugz Ashlee

Monday 14 June 2021

Club Canvo JULY spreads...!!

 Hello my bullet journaling friends...

Here are my spreads all done and ready for July...

I used the latest products included in the Club Canvo shipment from "Catherine Pooler Designs"!!


I always like to do a cover page for the month where I add a mini version of the calendar so I can always quickly see the date/day...


For my second spread I did a month page where I can add little notes for each day...


This spread is for adding all my memories for the month of July... 
A nice spot to write everything that I don't want to forget!!

Ink colours I used for all the stamping, ink blending and colouring are :

- Midnight
- Tranquil
- It's a boy
- Icing on the cake
- Samba
- Melon ice
- Daydream
- Tiara


For my last page I wanted to have a spread where I could add any notes, to-do's or anything I need writing space for...

I coloured in all the images using CPD inks and a blender pen!! 

I hope you enjoy these Canvo spreads for JULY, have you got yours ready to start the new month?

Happy journalling everyone, Hugz Ashlee

Wednesday 9 June 2021

Creative thinking release day at CPD....!!

Hey my crafty friends...


I'm back with some more inspiration using products from the new release at "Catherine Pooler Designs" Creative thinking and guess what today is release day yipppeeee!!....

The cards I'm sharing are made from products that are included in the Sketchbook bundle but will all be available separately also!! 


This first card I made using the "Mosaic tile" die which I die cut from a piece of cardstock that I had ink blended with CPD inks...

I glued a mix of them onto the card base and then added some smaller triangles onto with some foam tape for dimension...

I then stamped, coloured and die cut a bunch of the scissors from the "Desktop treasures" stamp set. I coloured them with alcohol markers from Parkoo shop!!

I added the scissors over the triangles and then stamped a sentiment also from the desktop treasure set and finished off with some "Scranton" sequins...

On to my second card for today...


I wanted to create the look of items all sitting on a desk so I used a piece of the designer paper from the "Sketchbook" paper pack and cut it on an angle to make it look a bit like a tablecloth...

I then stamped/coloured up a bunch of the images to fill my table and die cut them with the "co-ordinating dies" before adding them to the card base with varying layers of foam tape!!

I finished this one off by adding a sentiment...

Here is a bit of a close up of all my cards using the sketchbook bundle!!


I had so much fun creating these cards, I can't wait to make some more using these goodies!!


The release is now live and ready for you to add to your collection.... who's going shopping??


I hope you enjoyed these creations, Im sure I will be back with more inspiration soon!!

 Happy crafting, hugz Ashlee

Tuesday 8 June 2021

CPD release - Sketchbook bundle....!!

Hello my crafty friends...

I'm super excited because there is a new release on the horizon at "Catherine Pooler Designs" and boy oh boy it is awesome!! I think I say that every month but it really is hehe....

This new collection is called..... Creative thinking


Today I've got a couple cards to share with you using the bundle just revealed today "Sketchbook"!!

I absolutely love this bundle, I couldn't wait to create with it once I seen it...


This first card I made using the "Desktop treasures" stamp set (co-ordinating dies) along with the "Xanadu" cover plate die...

I backed the cut out part of the coverplate with a piece of designer paper from the "Sketchbook" paper pack. This paper pack is full of super fun designs and colours!!

I coloured up a bunch of the stamped images using Parkoo shop alcohol markers and added them to my card base using foam tape for dimension and then finished it all off with some "Scranton" sequins....

On to my second card...


For this card I stamped directly onto my white cardstock base a sentiment from the desktop treasures stamp set and some pencil shavings...

I then stamped, coloured and die cut some images also from the same stamp set which I then added onto the base with foam tape!!

I finished it all off with some Scranton sequins that I applied with glue dots...


I've got more cards to share with you soon that I made with this bundle so keep an eye out for more inspiration...

Be sure to check it with Catherine and Erika this week as there will be lots of sneak peeks/reveals of all the new goodies!!

 Happy crafting, hugz Ashlee

A rainbow just for you....!!

 Hey everyone....

I have a brand new card up on the blog over at Create a Smile stamps, I'd love for you to pop on over there and see all the details on how I created this card!!


You can pop on over to the Create a Smile blog here!!

I hope you enjoy this bright and cheery rainbow card...

Crafty Hugz Ashlee  

Saturday 5 June 2021

WOW! Embossing new release...!!

Hi everyone...

Do you love "WOW! Embossing" powder because I sure do hehe....

I just wanted to pop in and share with you all a couple of cards I made using some of the latest released products at WOW! Embossing!! 

These cards were made for an Instagram hop that we have going at the moment to celebrate all the new goodies, so I highly recommend popping over to Insta and checking out all the amazing creations....


For my first card I made a slimline by masking off the top half of my card base and doing an ink blend of two colours using Catherine Pooler inks...

I then stamped the "Foliage background" stamp using black ink before stamping the "Foliage background outline" over the top using WOW! Ultra slow dry ink and embossing with "Petalicious" powder from the English garden trio...

I then finished it off by adding a sentiment from the "Thankyou" stamp set and a touch of clear sequins!!

Onto my second card...


For this one I started off with a base of watercolour cardstock so I could do some ink blending over the "Confetti heart" stencil!!

Once I had finished the ink blending I then masked off the heart area and inked the spots with WOW! Ultra slow dry ink...

I wanted to use two different embossing powers to emboss the dots so I sprinkled over parts of the spots using "Petalicious" tipped off the excess and then added "Fresh stem" over the rest of the spots creating a fun mix of the colours over the dots. I then heat set with my WOW! dual heat gun!! 

I added a die cut BEST sentiment from Catherine Pooler and then added an embossed sentiment using "Opaque bright white" powder over black cardstock...

The sentiment on the strip is from the "Thankyou sentiments" stamp set also from the new release!!


I hope you will come over to Insta and hop along with us... 

Did I mention there are prizes up for grabs??

Happy embossing everyone, hugz Ashlee

Wednesday 2 June 2021

Ombre slimline style....!!

 Hey my crafty friends...

It's a new month and that means a brand new theme for our challenge at "WOW! Embossing"...

This month our theme is "Ombre slimline style"!! 

You can join us in the challenge by using the hashtag #wowembossingchallenge or visiting us at the WOW! Facebook fans group!!


I made this faux ombre card by doing an ink blend of three different shades of pink and then embossing the whole panel with WOW! clear gloss embossing powder before die cutting it with the "Flowering slimline" die from Spellbinders!!


I added lots of pretty flower details using the die "Simply perfect layered blooms" also from Spellbinders...


To complete this card I added a sentiment banner and lots of sequins!!

I hope you enjoyed this card and I'd love for you to come and join us in the challenge...

If you would like to do some shopping at the WOW! store you are always free to use my discount code WOWDTAB for 10% off your order!!

Happy embossing my friends, Hugz Ashlee